Magic Lantern allows you to create custom crop marks which are overlaid on your live view screen. This can be incredibly useful for all sorts of photography, timelaspe, and filmmaking work.
I really wanted to be able to have white crop marks for night work where the subject is darker. After hours of tinkering I finally figured out a way to do it, just follow the instructions carefully and you will nail this. I’ve included some demo files.
I ran into issues getting the original cropmarks tutorial instructions to work for me, possibly as I was working in Illustrator first. I’ll leave the RLE compression part out of this tutorial as it works just fine, you can refer to that in the previous link (my example files contain the RLE app).
Hopefully this will save you a ton of time either way.
First step, download the Magic Lantern Custom Crop Marks example files…
Nb. I always make my custom crop marks in Illustrator, but you’ll need to process the artwork in Photoshop afterwards. Of course, you can skip Illustrator and just you Photoshop if you like, just remember to use shape layers / switch off anti-aliasing. These instructions pertain to using Mac OS X Yosemite with the latest Adobe CC apps, although I can’t imagine you’d have any issues using any versions of Photoshop and Illustrator.
Illustrator
- Open Illustrator and create a new 720 x 480 document. Make sure your Document Colour Mode is se to RGB.
- Create a new layer and add a white rectangle, the same dimensions as the document, to act as a background for precise positioning. Lock the layer.
- Create a second layer and design your custom crop marks layout using 2px width black lines. You can use 1px, but the lines will be slight. 2px lines show up much better.
- Once complete, unlock the first background layer and copy all your vector art, including the white background layer, into the clipboard using ‘Select All’.
Photoshop
- Create a new 720 x 480 RGB document.
- Paste your vector artwork from the clipboard and choose ‘Smart Object’ and before committing / placing, ensure you uncheck ‘Anti-alias’ in Photoshop’s top bar (fig.1). If you don’t do this, things will not look right.
- From the ‘Image’ menu, choose ‘Mode > Indexed Colour’ and flatten the layers.
- Next to ‘Forced’ choose ‘Custom’ then ‘Load’ and choose: for White crop marks: ‘MLColortable_White.act’ (Palette with show ‘Exact’) (fig.2 & 3), for Black crop marks: ‘MLColortable_Black.act’ (Palette will show ‘Local Selective’)*
- Choose ‘Save As’ and select the BMP format : File Format ‘Windows’, Depth ’8 Bit’.
-
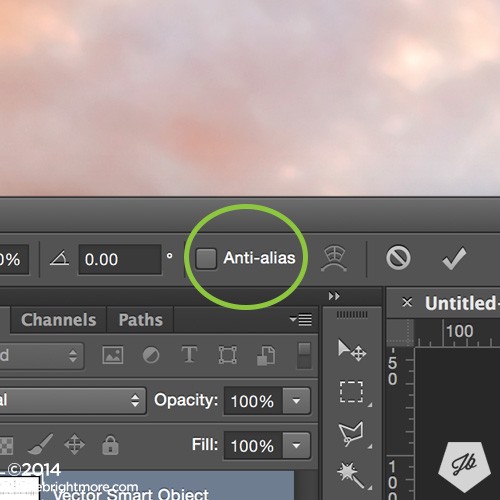
fig.1 -
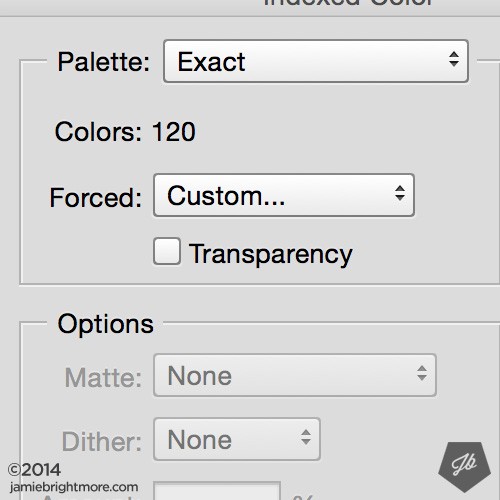
fig.2 -
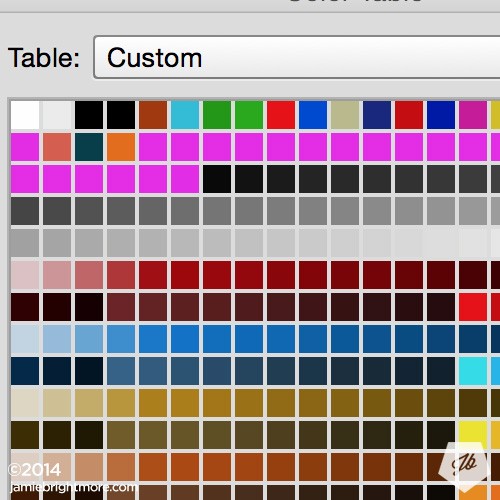
fig.3
RLE compression
You must use the compression tool, follow the instructions here: http://magiclantern.wikia.com/wiki/Cropmarks
Load onto your SD card
Finally, make sure you rename your custom crop mark files by removing the .rle suffix so they read .bmp before dropping them into your Magic Lantern SD card/s under:
SD card root > ML > cropmarks
Conclusion
I’ve tested this process several times so I know it works well. One thing to note is ML doesn’t have much room to display your file names, so if you create several crop mark files, just be sure to keep the file name nice and succinct.
The example files I’ve provided contain; jb_example.rle-final.blk.bmp and jb_example.rle-final.wht.bmp – rename these to something shorter and load them into your ML SD card to test the demos.
If you find this useful, please leave me a comment and share the page.
Enjoy : )
- *The Black .act file comes from one of the pre-installed crop mark files, the White .act file was from the original download.
SUBSCRIBE FOR FRESH CONTENT
Follow me on social media for updates.